Creating a Field Mapping
This procedure describes how to create a field mapping.
Tip: If you are mapping fields whose values differ across the systems you are synchronizing, you must first create a mapping group
for that field. See
Mapping Groups for more information.
-
Go to the
AccuSync Management Console main page.
Tip: Clicking the AccuSync logo at the top of any page takes you to the main page.
-
Click the
Edit Configuration button
 .
.
The Configuration page appears. -
In the
Mapping Definitions table, click the
Edit Mapping Definition button
.
The
Mapping Definition page appears.
-
In the
Field Mappings table, click the
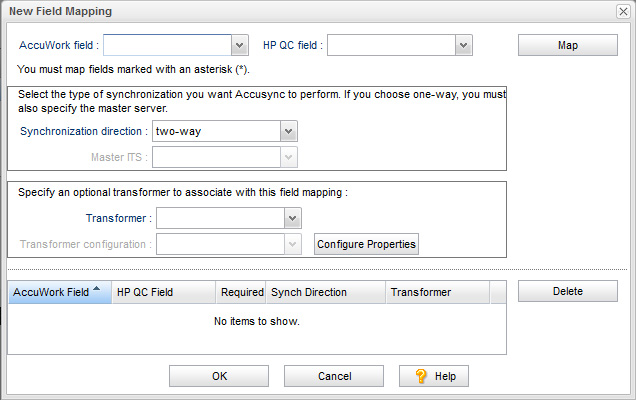
Add new... button.
The
New Field Mapping dialog box appears. The dialog box for HP ALM is shown here. The dialog box for other ITSs contain the same fields.
-
In the
AccuRev field and
<ITS_name> field, choose the pair of fields you want to map.
Note: Fields required for your ITS are displayed with an asterisk in the lists.
-
Optionally, change the synchronization direction.
The default is two-way. If you choose one-way, you must also specify a value for the
Master ITS field. The
Master ITS is the ITS whose data you want to use to update the issue records on the other ITS.
Note: By default, every field mapping inherits the synchronization type specified for the synchronization pattern to which the mapping definition belongs. You can override that synchronization type for an individual field mapping. See Synchronization Types Inherited from Synchronization Pattern for more information.
-
Optionally, choose a transformer from the
Transformer list for this field mapping.
Note: If you use the Special Values Transformer, you must specify the mapping group you want to use. To use an existing mapping group, choose one from the Transformer configuration list. If you have not already created the mapping group for this field mapping, click the Configure Properties button to open the Mapping Groups page. See Transformers for more information.
- Click the Map button. The new field mapping appears in the table at the bottom of the dialog box.
- When you are done creating field mappings, click OK.
The
New Field Mapping dialog box closes and you are returned to the
Mapping Definition page. The field mappings you created appear in the
Field Mappings table. The table also displays type information for each of the mapped fields, as well as the synchronization type.
Once you have created the field mappings for a mapping definition, you can define the synchronization pattern that uses
the mapping definition. See
Synchronization Patterns.